Category Archives: Tables

Front Hall Table

Finally finished finishing the finish on this small table for the front hall entry area of the house.

(click photos to view larger on Flickr)

Front Hall Table 1

The table is made of walnut with maple racing stripes for speed and agility. Standard mortise and tenon joinery was used. The finish is about 4-6 coats of Minwax Wipe-On Poly (more on the top).

Front Hall Table 2

The shape of the top is kind of a modified octagon. Octagons are a bit of a theme around here: there’s a small octagonal window above the front door, the front garden bed is octagonal. There’s even an octagonal planter (or small umbrella stand) pictured on the floor there in the corner.

Front Hall Table 3

I’ve been dawdling over this one all summer, nice to see it finally done.

Front Hall Table 4

Hall Table (Unfinished)

A small table for the front hall, this has not yet had any finish applied, and the top is not yet attached, but otherwise it’s done! Finally. I’ve been dithering over this one, both design and execution, for many weeks. This is its last stop in the shop before coming inside for final cleanup and finishing.

Hall Table Unfinished (1)

Lynda suggested the stripes would look better at the front, an idea I’m warming to. Don’t have to make that decision until I attach the top, though, which will be the very last thing. I do think the legs at the back in this view look a bit better facing forward.

Hall Table Unfinished (2)

(Click photos to view larger on Flickr)

Long Pine Office Table

Here’s a look at the long pine table made of Eastern White Pine that I made for Lynda’s office. She was going to buy some cheap IKEA crap, but as I joked at the time, I felt I had the both the tools and the know-how to make our own cheap IKEA crap. Only not as cheap. And it doesn’t come apart for shipping in flat boxes. It’s had 3 coats of Wipe-on Poly (5 on the top) and some paste wax to shine it up a bit. It’s not perfect, but it turned out pretty well I think!

Pine Table - Finished!
Click photo to view larger on Flickr.

Small PineTable


Small PineTable, originally uploaded by rgdaniel.

The “design” for this is not only dead simple, but was lifted from an existing table of ours, which was kind of messed up and needed replacing. Just four straight legs, four stretchers mortised into the legs, and a square top made from four narrower boards. If this table was a song, it would definitely be in 4/4 time.

TV Stand Finally Done

(clicking photos takes you to Flickr page)

Well it’s been a long time coming, but the long-awaited TV stand is finally a reality… much as it pains me to use “reality” and “TV” in the same sentence.

It’s posing here under the living-room window to show off its shiny finish, but obviously this is not its final home.  It needs to go into the corner, but not until I dismantle all the existing devices and make room for it… which I’m avoiding doing even as I type this.

The piece is made from walnut-veneered material, with solid walnut base, trim, and accents. It’s a pretty straightforward case design, employing biscuit joinery for the flat pieces, and just glue for the edge trim. The base is attached with pocket screws. During the design process, I decided that providing a shelf was not going to be necessary, based on our components that are going in here, it will be better to just stack them.  If I change my mind again, it should be simple enough to add a shelf.

TV Stand Finally Done

The piece had some walnut stain applied… long story… I noticed too late that there was some funky stuff going on with one of the side pieces, where the veneer was allowing the underlying particle board to show through. I attempted to fix this with stain, but this was not successful at hiding the problem.  So what I came up with was to apply a flat panel of solid walnut to each side, left unstained to let it stand out as an accent piece.  Looks okay, I think.  I’m still worried that wood movement may cause the accent panels to become unstuck from the sides, but I’ll deal with that when and if…

I made the base with a pretty standard arched cutout to form “feet” at the corners. The base pieces are solid walnut, mitered at the corners, with the arch feature on all four pieces.  When considering the back of the case, which is just 1/4″ hardboard painted black, I wanted to leave holes for ventilation at the top, and wires at the bottom.  Rather than just drill the usual holes for this, I elected to repeat the arch detail of the base. I made four cutouts, two top and two bottom, to allow for feeding wires to both sides, and for air movement.  You can only see the bottom ones in the photos.

TV Stand Edge Trim ProfileFinally, I should talk about the edge trim. It’s solid walnut, just with simple 1/4″ roundovers on the three vertical pieces, but for the top and bottom I wanted something a bit more substantial.  By using a full one-inch piece, I was able to “wrap” it around the edge, providing way more glue surface, as well as support from underneath, making it safer to grab and lift the finished piece without the trim ripping off. And of course it gives the illusion that the top and bottom are themselves a full inch thick.

I’m just glad it’s done…


Am I Screwed?

With dawning horror, I realize I have made a probably fatal mistake, total rookie move, in the construction of my TV stand… in order to disguise some ugly defects in the walnut veneer of one of the side pieces (which I should have picked up on earlier in the process, another rookie move) I decided to cover it with a nice little panel of solid walnut.

Bob's Folly?

Bob's Folly?

The two “patches” are each a solid piece, about 8″x11″, planed down to about 1/2″, a nice roundover, looks great. I slathered it with Titebond III and glued it to the particle board. The first time, it started to warp and come away after the clamps came off, due to the moisture of the glue I guess, but after a reglue with the clamps on a full 24 hours, it looks like it’s holding…

The problem is, it never even dawned on me to consider wood movement. I’m afraid the panel will expand across its width when summer humidity hits, and one day I’ll just find it on the floor, the glue bond broken. Or worse, damage will be done to the particle board making a repair impossible.

So my question is, should I just kill myself now, or wait for it to actually break. Or maybe even, is there something I can actually do about it…?? Any insights or public humiliations are welcome. (I’ve also posted this to the Sawmill Creek and Wood Whisperer Community forums, so I’m sure I’ll get told…)

Miters Well

TV Stand Artist Rendering
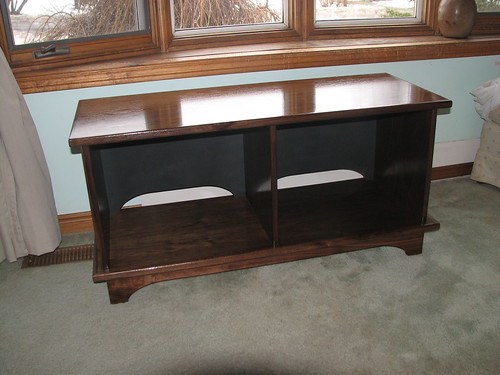
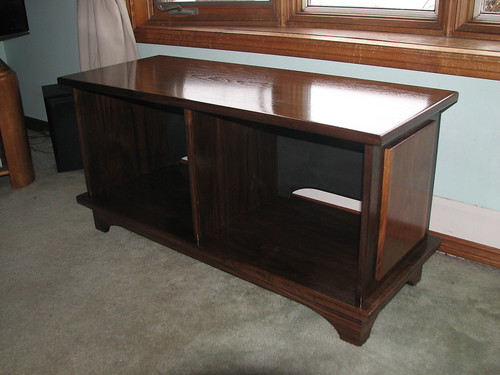
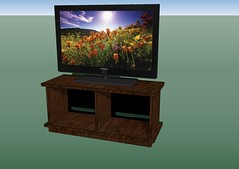
Before I could continue working on the much anticipated TV stand (see artist’s rendering) I knew I had to make something else first. Not as a distraction or delaying tactic, though you might be forgiven for immediately suspecting that, but as a necessary step towards completing the project. I needed to build a miter sled.   The exposed edges of the walnut-veneered particle board are to be covered with solid walnut trim pieces, which I have mostly milled and ready to cut to length. (Still deciding on final profile, I will probably do the round-over at the router table while I still can…

The idea of the miter sled is to allow the cutting of these trim pieces with sufficient accuracy that they will not show any gaps at the 45-degree joints at the corners. This is  difficult using the standard table-saw miter guage.

IMG_1197 MitreSled-1-OverviewThe first photo shows the finished sled, in place on the table saw. I used Baltic Birch Plywood for all the parts, because I just love the stuff and it’s perfect for this kind of thing. I only use Home Despot plywood for catching glue drips, or similar demeaning tasks that are all it’s good for…

The eagle-eyed will have noticed that my outfeed table is actually my wife’s  Honda Fit. It’s at a bit of an awkward angle, but in its defense it does get great gas mileage…

IMG_1193 MitreSled-2-First CutThe reason for the numbers is as follows: rather than depend on the angle being a perfect 45 degrees, which is difficult to find in real life and prone to inaccuracy, the sled depends on the two angles being part of a perfect 90 degrees, which is found all over the shop… In this case, the factory corner of a piece of Baltic Birch Plywood (accept no substitutes) was found to be a perfect ninety, and formed the pointy bit on the sled, the bit with the very attractive visible screws. So long as you cut one half of the joint on one side, and the other half on the other side, you KNOW it’s going to add up to that perfect ninety. Or at least, I HOPED it would.

IMG_1194 MitreSled-3-Second CutSo I tested by cutting a piece of scrap (expendable Home Despot crappy plywood as it turns out) in half, then mitering one half on side #1 (left) and then the other half on side #2 (right). These should result in a perfect ninety-degree corner with no gaps.

IMG_1195 MitreSled-4-Finished Joint

Yay! Looks like it worked! Okay, no excuses, gotta get that trim glued on… Well, after I mill it to final profile…

TV Stand – FINAL


TV Stand – FINAL

Originally uploaded by rgdaniel

This is (hopefully) the last of at least 7 design iterations in Sketchup for the TV stand I’ve been mulling over for several months now… Version 6 was actually marked final and the cutting had begun, when I realized that the shelves it included would not be necessary and would in fact unacceptably reduce the available space for components.

The main pieces were already cut based on version 6 of the plan, which had a full-thickness back, stopping short of the top and bottom (for ventilation). This would have involved a ridiculous amount of wood trim to cover exposed particle board, more than anywhere else on the project… It didn’t make sense to put all that effort into trimming out the least-visible part of the thing.

So here I went with 1/4-inch hardboard for the back, full-coverage, with ventilation holes and wire-access holes, top and bottom.

Exposed edges will all be trimmed out with solid walnut, with the top and bottom receiving a full inch-wide treatment, giving them the illusion of being thicker, and differentiating them from the upright pieces (sides and divider). The base will be mitered, all going well…

We’ll see if this plan holds through the whole build…

( Click for larger version on Flickr )