Here are a couple of rollerball pens I just made.
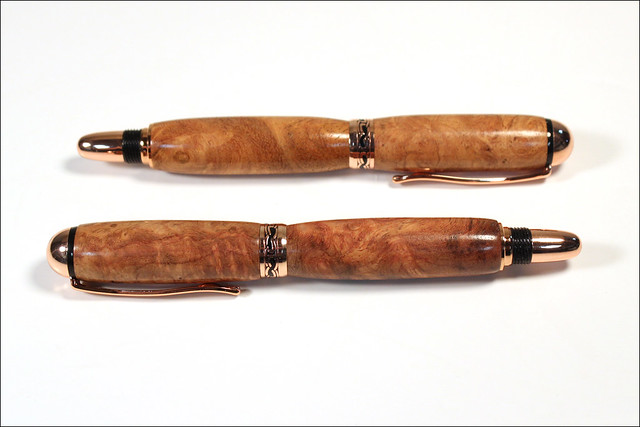
They are “Sedona” style, copper finish, and the wood is either Afzelia Burl or Box Elder Burl, not quite sure…
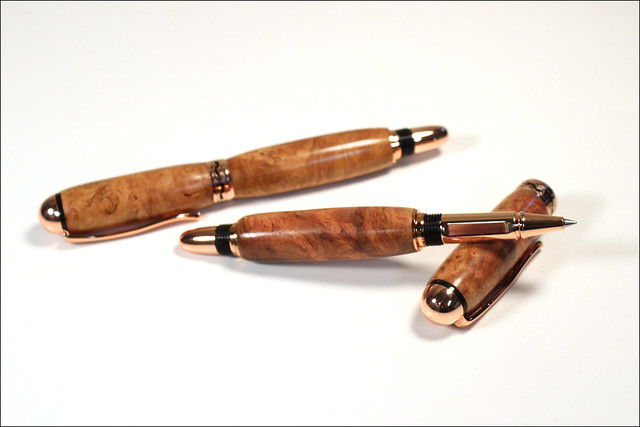
Here are a couple of rollerball pens I just made.
They are “Sedona” style, copper finish, and the wood is either Afzelia Burl or Box Elder Burl, not quite sure…
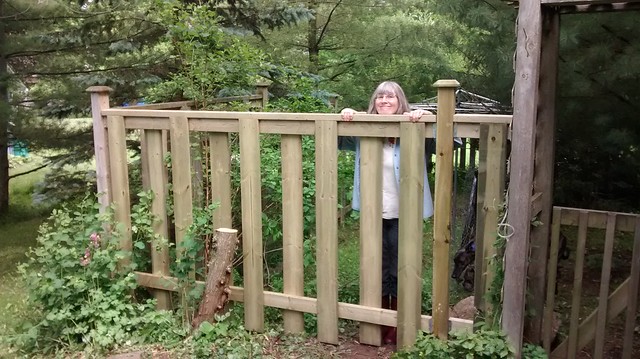
Lynda models the new section of fence I just finished. You can see the now-decorative stump of the tree I cut down the other day, making all this necessary.
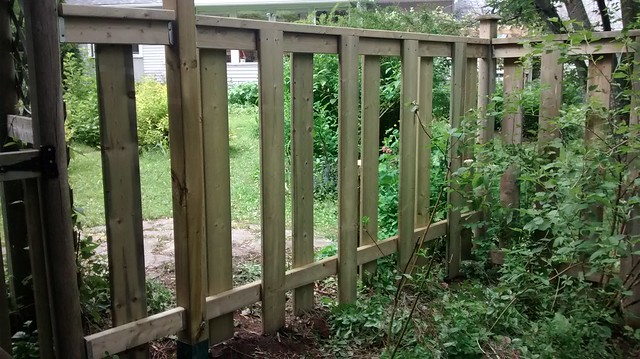
Here’s the view from the fenced-in side. Dog’s eye view, basically.
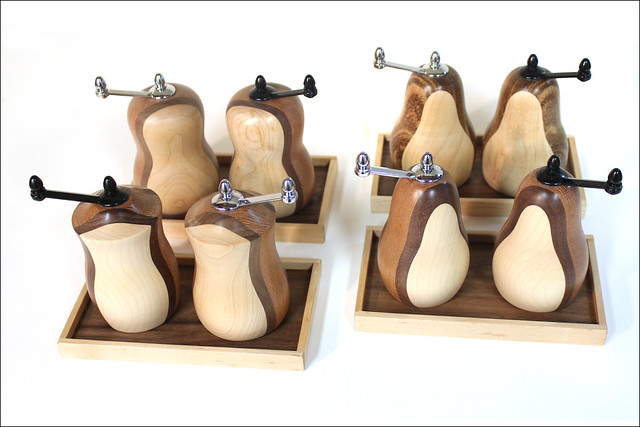
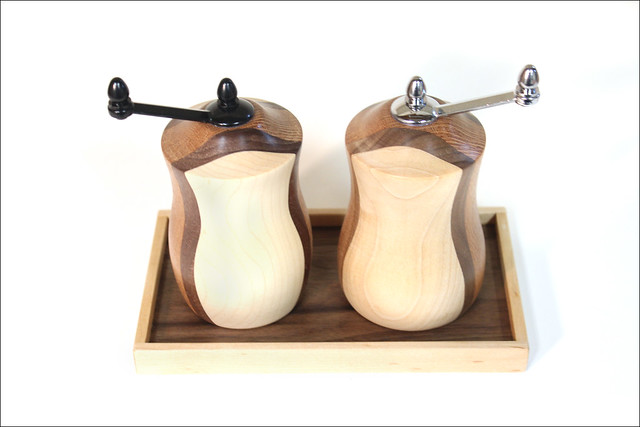
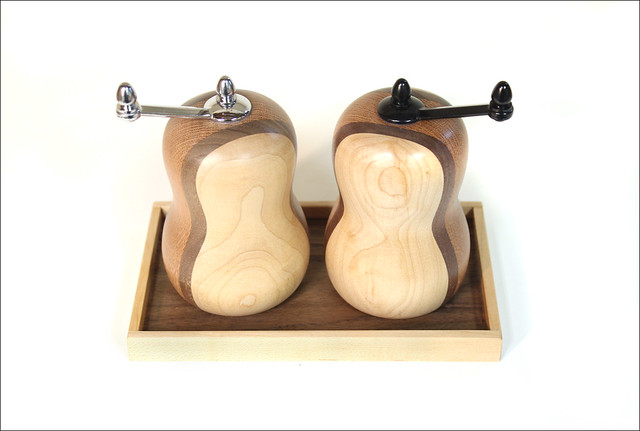
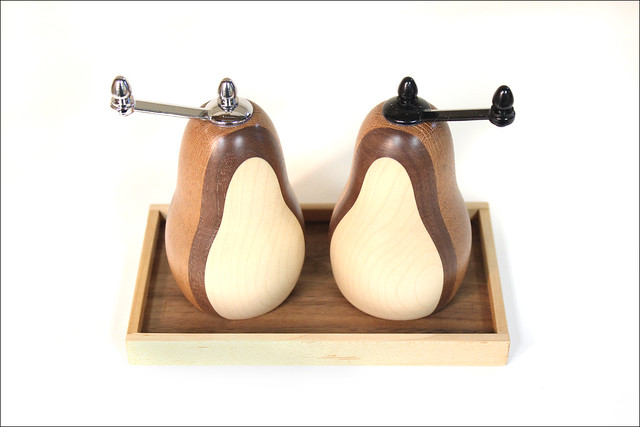
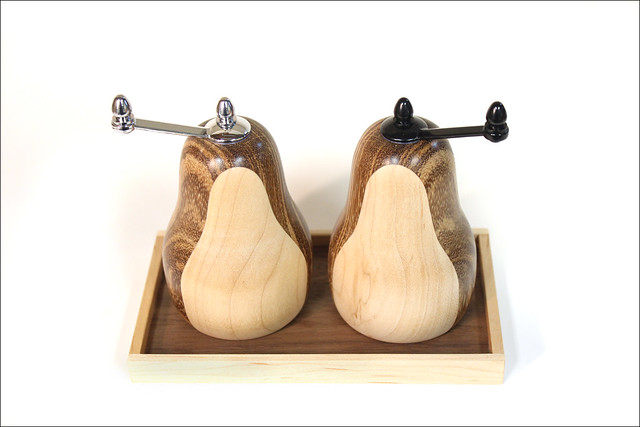
I recently ordered ten more grinder kits. One is currently in use by me, one is not yet built, and the other eight are here. These four sets (chrome handle for salt, black handle for pepper) also come with a small tray to keep the stray salt and pepper bits off the table.
(Click any photo to view larger on Flickr)
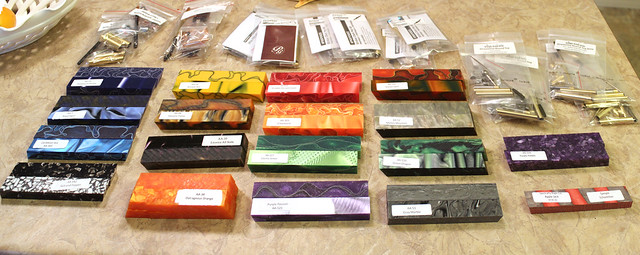
In a moment of weakness, I stocked up on pen-making supplies. Except for a sample Spectraply they threw in, these are all acrylic blanks, as I found myself attracted to their colorful shininess.
(Click photo to view larger on Flickr)
Here’s a link to a page with the larger photo sizes of this picture, so you can see the blanks up close and read the cute names:
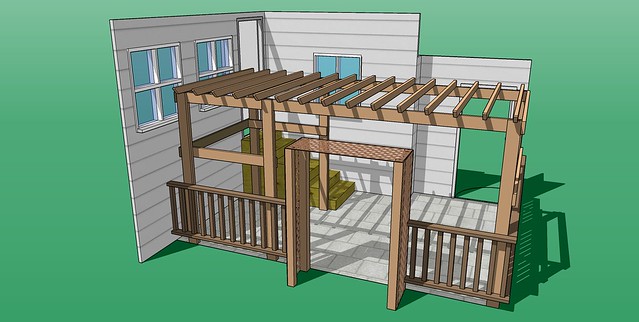
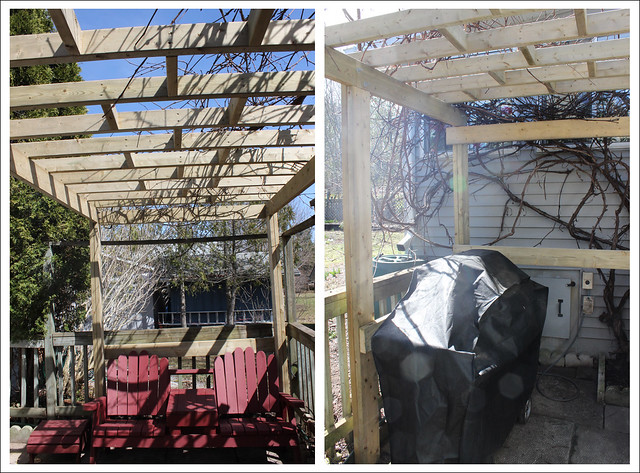
I thought I would collect all the photos from the pergola project I just completed, from initial Sketchup drawings to the final thing itself. It’s not fine woodworking, but it should get the job done. Time will tell.
(click any photo to view larger on Flickr)
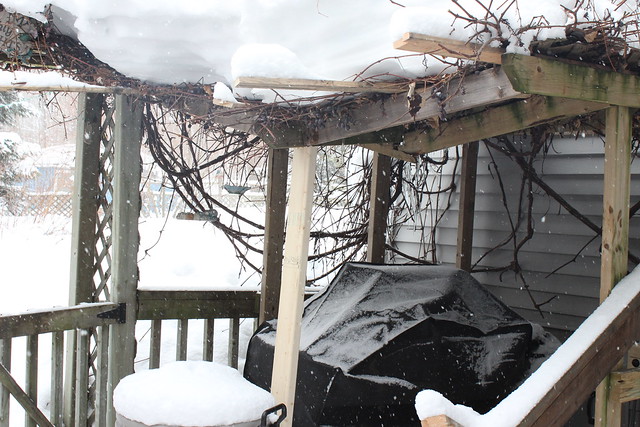
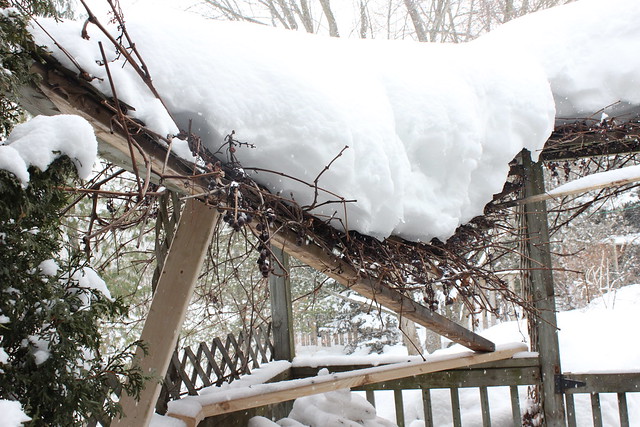
The winter of 2014-2014 brought a tremendous amount of snow our way, and thanks to the Polar Vortex, very few opportunities for it to melt. Our old pergola, and a separate section of lattice covering another corner of the patio, were no match for the snow load.
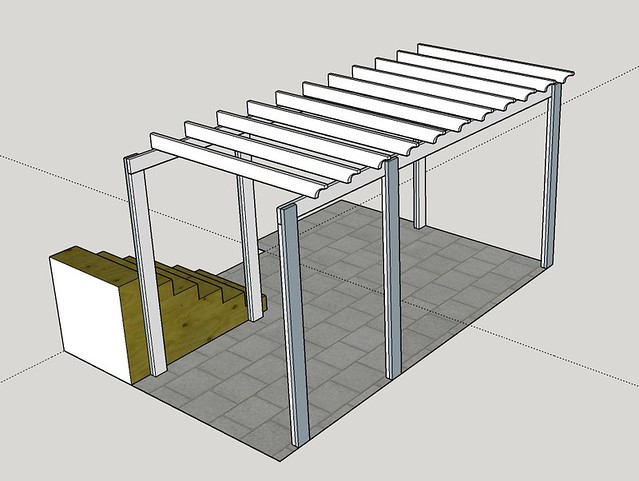
So a new arbour was definitely going to be necessary, and the planning stage began. Here’s the final iteration of the plan as drawn in Sketchup. It’s more or less what I stuck to, apart from the horizontal braces around the left side, which are in slightly different positions. And the small spacer blocks between the rafters are not shown here.
This is a video walkthrough of the Sketchup plan.
As soon as winter seemed to be more or less done with us, I was able to reclaim the car-sized front of my shop for shoppish purposes, like stacking and stickering a delivery of treated lumber for the pergola (or is it an arbour?)

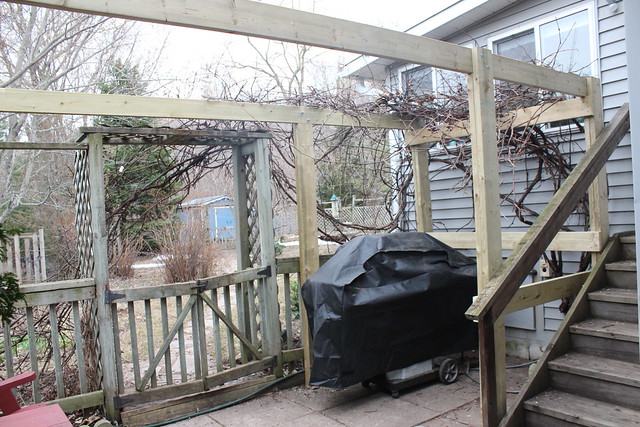
During demolition, my wife had the clever idea of leaving the sides of the old pergola in place, to hold the grapevine up and allow me to build underneath it. This worked pretty well, overall, although much wrestling with the grapevine ensued at various times.
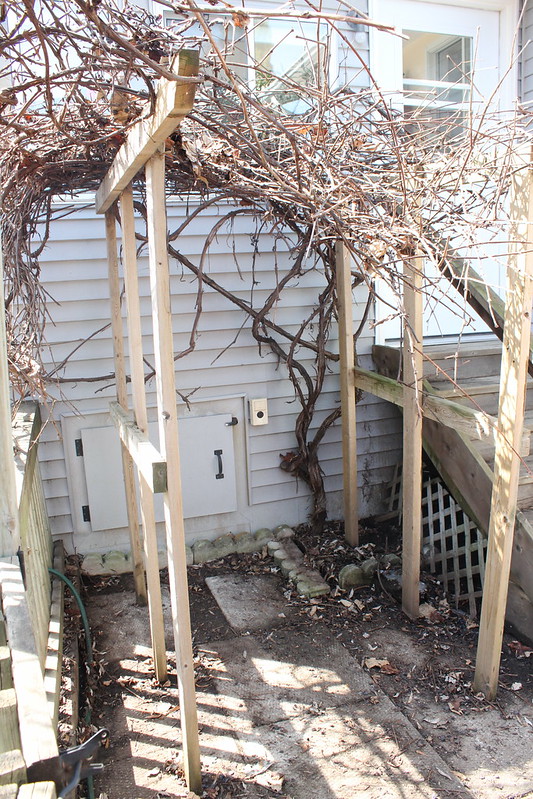
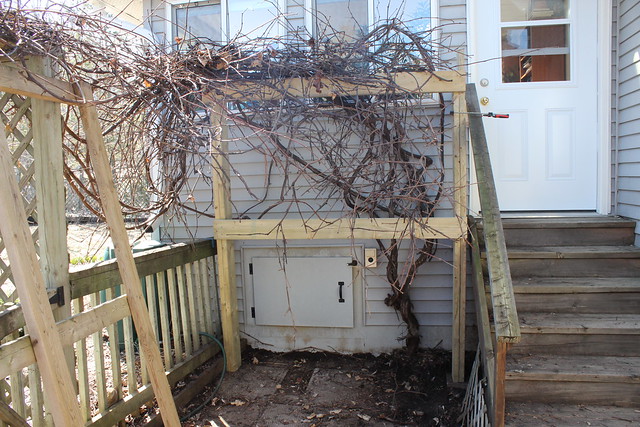
Each of the six posts for the new pergola consisted of two laminated 2×6 boards, one of them a bit shorter for the beams to sit on. I first made the end assembly for the end under the grapevine, consisting of two posts and two cross braces. Wedging this into the corner with the tangly mangly grapevine resisting at every turn was great fun, but once in place it kept the vines up high and mostly manageable for the rest of the project.
I next built and positioned the other end assembly, which the allowed me to get the beams sitting pretty on their little ledges on the posts. I clamped the beams in position while I drilled the holes for the carriage bolts.
I debated whether I even needed the other two posts, as it seemed fairly sturdy, but I went ahead anyway. Thinking back to winter, I didn’t want any more trouble… So all six posts are in place now.

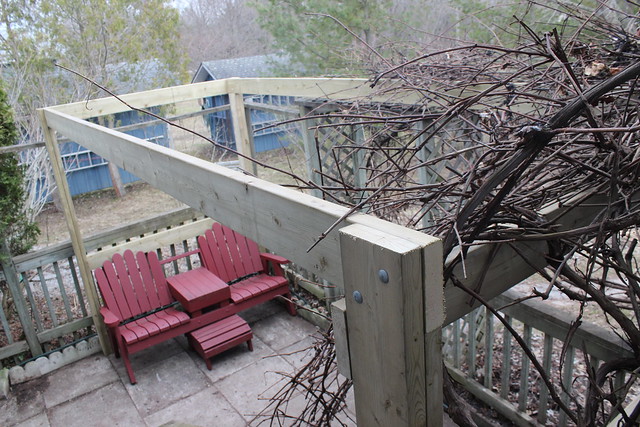
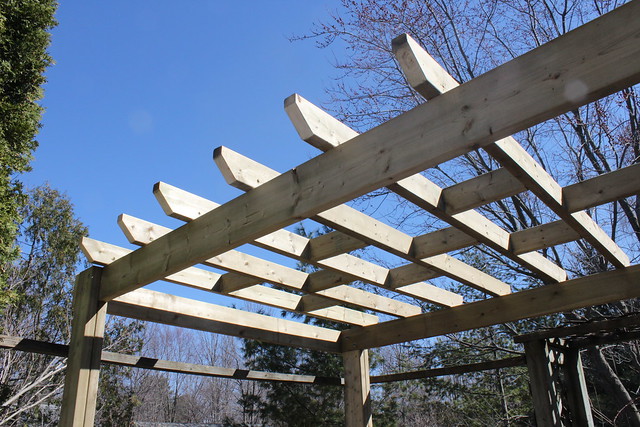
With the structure complete, it’s time to add the rafters. I built these as assemblies of two rafters at a time, with a pair of spacer blocks holding them together at the right spacing, 12 inches on centre. A third spacer in the center pointed the way for the next pair of rafters. This pattern of spacers repeats along the whole length of the pergola.
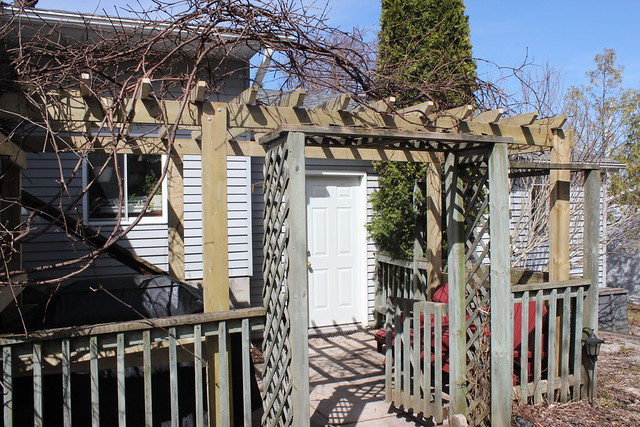
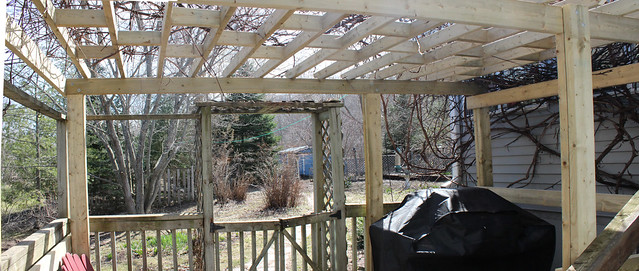
After some final wrangling (and swearing) as I used a 2×4 to push as much of the vine as possible back up onto the pergola, we called it done!
Time for a barbecue!
That’s a big-ass pile of pressure-treated lumber, all stickered for airflow. Needs to be a bit drier before I can work with it. That’s my story and I’m sticking to it.
The old pergola (or is it an arbour?) was half-dismantled, leaving the sides only, to hold up the grapevine. The new bits should be able to slide in behind the old bits. This project would be a lot easier if it was just out in a field somewhere. All these obstructions (grapevine, fence, stairs, house) make it an interesting challenge…
(Click photos to view larger on Flickr.)
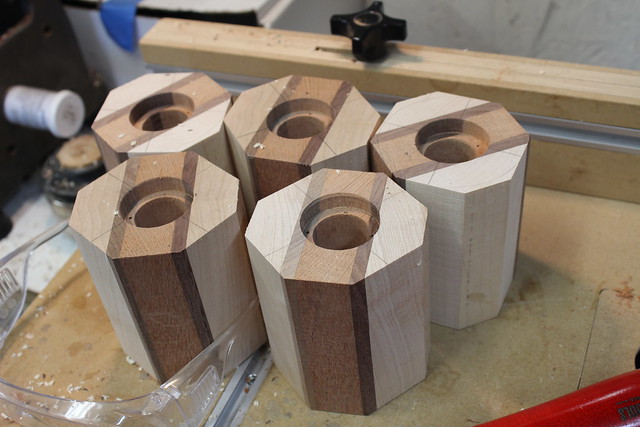
Working on some pepper/salt/spice grinders, shown here in progress.
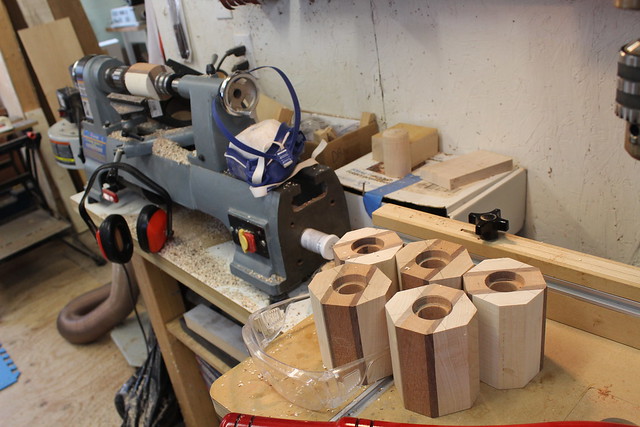
The laminated blanks are done, holes drilled, and corners cut off. Ready for turning! (One is already on the lathe and rounded). The wood is maple, walnut, and lacewood in the middle.
(Click any photo to view larger on Flickr)
(continued from previous post)
Getting my Sketchup feet under me again, finally. Here’s the latest iteration of our Pergola. Plan-wise, I’ve changed the rafters to 2x4s instead of 2x6s and spaced them 12 inches on centre instead of 16. Which is exactly the kind of change that using Sketchup allows you to visualize up front, BEFORE you buy the wood! Even the shadows are accurate for an early afternoon in late April at our latitude and longitude. That can be quite helpful in some cases, I expect, but we already know which way the sun comes in on our patio, so it’s more for fun really.
(Click photo to view larger on Flickr)
Update: Here’s a Sketchup video walkthrough, or flythrough:
Here’s the rough idea for rebuilding the arbour of our broken dreams.
I have a bit of a love/hate relationship with Sketchup. It’s in a world of its own, interface-wise, and not entirely in a good way. My pattern seems to be as follows:
For accuracy, there should be a probably be a step 4a: Walk away in disgust, come back later when I’ve had more tea.
Anyway, this will do for my purposes. I can estimate the number of 2×6’s to buy, and have a good visual in mind when knocking this thing together. There will be bracing and blocking involved that’s not shown here, and the shaped ends of the rafters (if that’s what we call them) will either be more elegant than shown, or else just a straight taper as I did previously.
Here are some recent projects from the Barkwhistle Wood Shop, while we wait for the Winter That Never Ends to, um, end. Outdoor projects await!
(Click any photo to view larger on Flickr)

Three Walnut Bowls. One of these we saw in the previous post, A Simple Walnut Bowl. The other two are just slightly less simple, so I simply call them bowls.
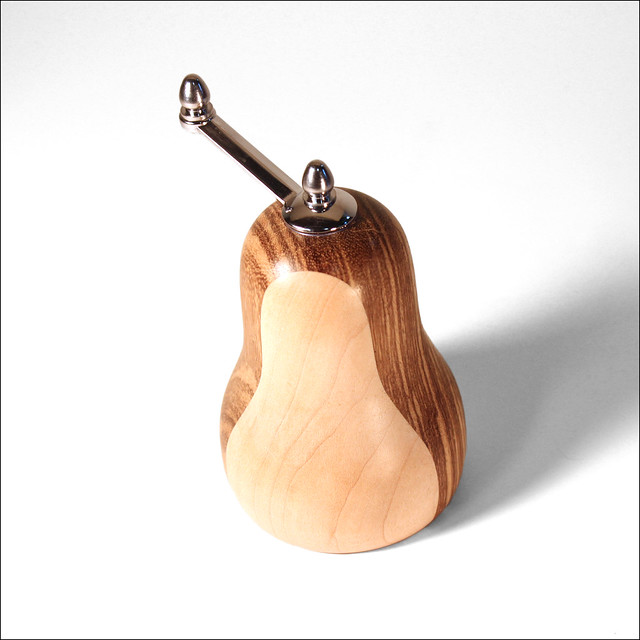
Salt Grinder. Could be called a pepper grinder or spice grinder, but currently it has hot spicy salt in it. Yum. The chrome handle is new; previous grinders had the black handles (e.g. these Lacewood Grinders), but I thought I’d do some chrome ones for a change, maybe make salt and pepper matching sets with chrome and black handles to tell the salt from the pepper. The wood here is zebrawood in a maple sandwich.
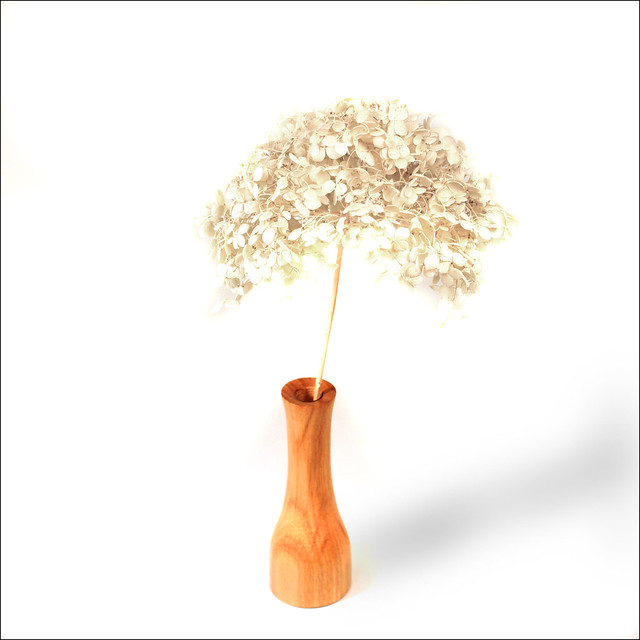
Canarywood Vase. I still have a whack of test tubes for bud vases, so these will appear from time to time. This is canarywood. I’ll probably do some laminating soon, make some slightly bigger ones.
That’s it for now, still waiting for the snow to melt so we can get on with rebuilding the grape arbour.