Last of these for a while..
(Click to view larger on Flickr)
Last of these for a while..
(Click to view larger on Flickr)
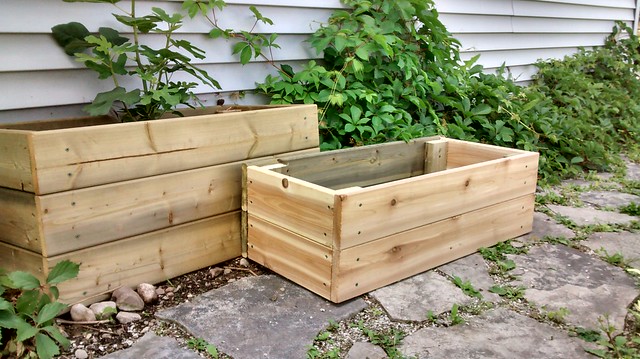
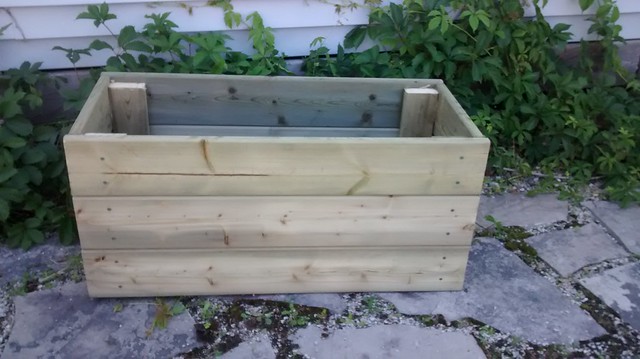
Another quick planter project, this one a third lower than the earlier version, as requested by my wife to provide a step-down effect, for visual interest. The front and sides are cedar, the back is pressure treated (not a design choice, just using up what I have).
(Click photo to view larger on Flickr)
See also “Quick and Dirty Planter” which is the larger one. Although really, you can see it just fine in this photo, so don’t worry. I’m just filling up space so the sidebar doesn’t bleed into the footer.
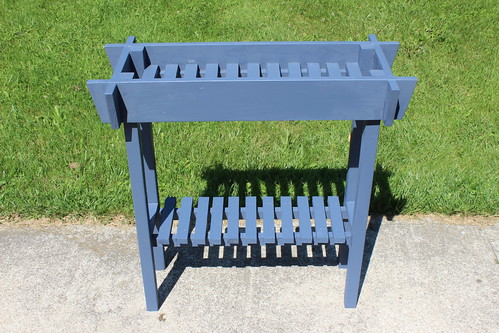
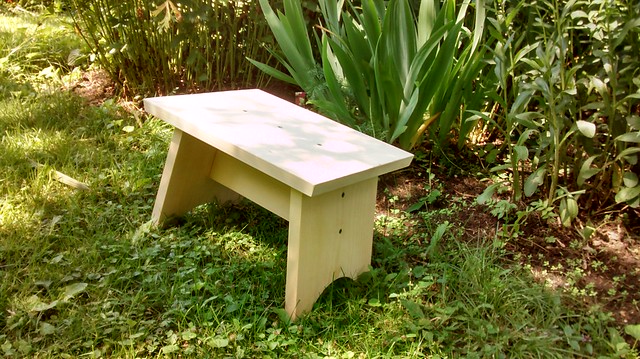
Another quick and dirty project, if slightly less quick or dirty than the recent planter. This is also by request of my wife. Ten-degree splay and bevel angles, and the curve in the legs is a gallon paint can. Finish TBD. It will probably get painted, if I know my wife. Which I do, somewhat.
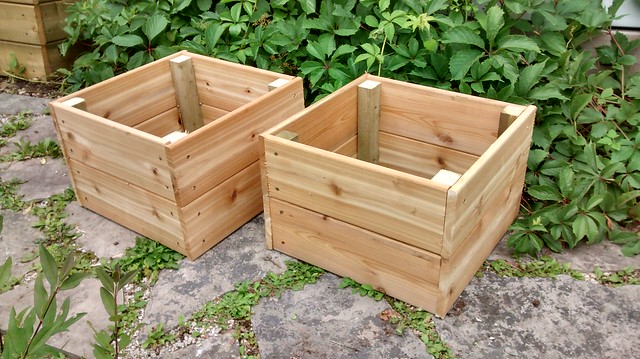
Just made a quick and dirty planter box, to use up wood left over from the fence and the pergola. It’s not yet in its final place (duh) pending a little site prep.
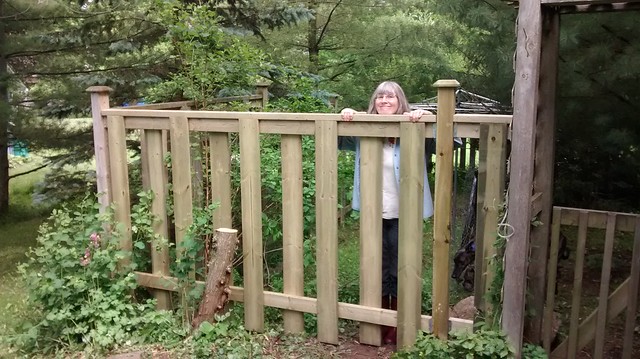
Lynda models the new section of fence I just finished. You can see the now-decorative stump of the tree I cut down the other day, making all this necessary.
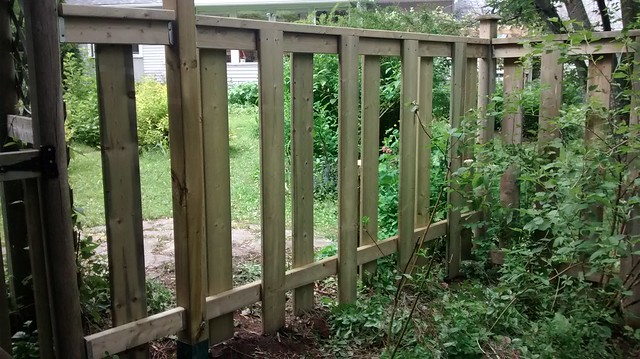
Here’s the view from the fenced-in side. Dog’s eye view, basically.
I thought I would collect all the photos from the pergola project I just completed, from initial Sketchup drawings to the final thing itself. It’s not fine woodworking, but it should get the job done. Time will tell.
(click any photo to view larger on Flickr)
The winter of 2014-2014 brought a tremendous amount of snow our way, and thanks to the Polar Vortex, very few opportunities for it to melt. Our old pergola, and a separate section of lattice covering another corner of the patio, were no match for the snow load.

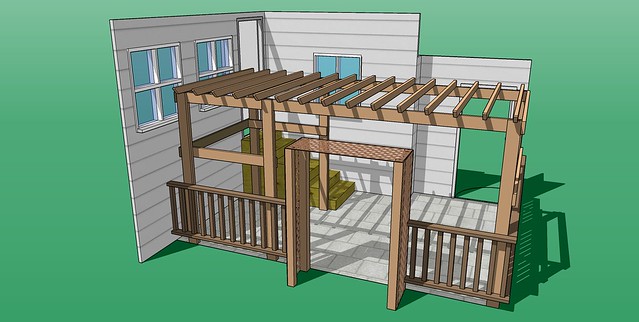
So a new arbour was definitely going to be necessary, and the planning stage began. Here’s the final iteration of the plan as drawn in Sketchup. It’s more or less what I stuck to, apart from the horizontal braces around the left side, which are in slightly different positions. And the small spacer blocks between the rafters are not shown here.
This is a video walkthrough of the Sketchup plan.
As soon as winter seemed to be more or less done with us, I was able to reclaim the car-sized front of my shop for shoppish purposes, like stacking and stickering a delivery of treated lumber for the pergola (or is it an arbour?)

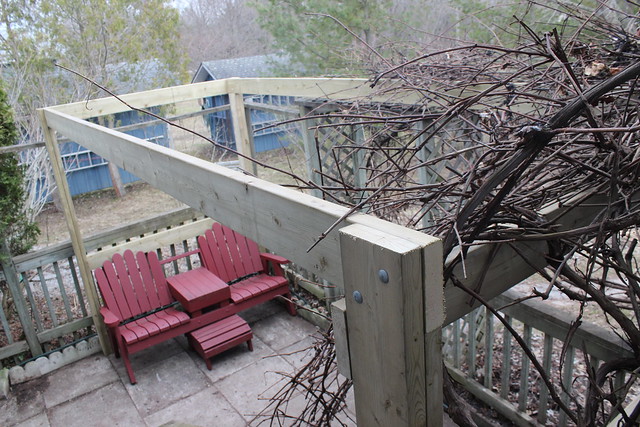
During demolition, my wife had the clever idea of leaving the sides of the old pergola in place, to hold the grapevine up and allow me to build underneath it. This worked pretty well, overall, although much wrestling with the grapevine ensued at various times.
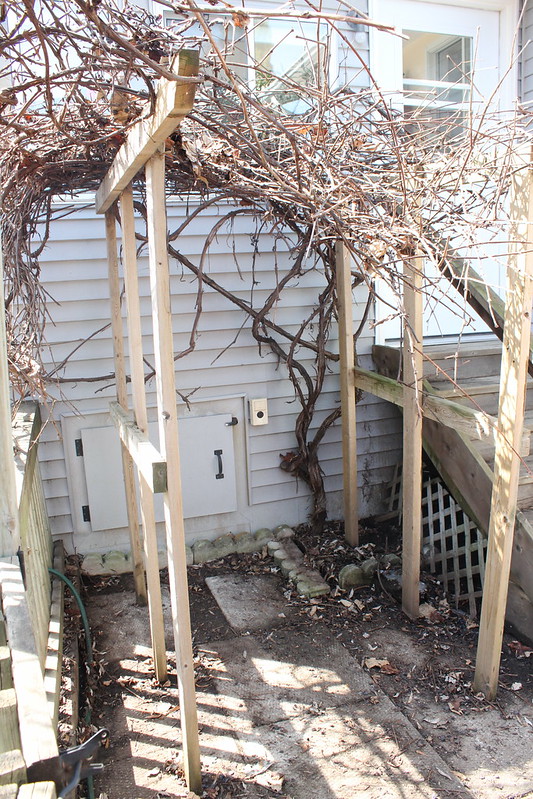
Each of the six posts for the new pergola consisted of two laminated 2×6 boards, one of them a bit shorter for the beams to sit on. I first made the end assembly for the end under the grapevine, consisting of two posts and two cross braces. Wedging this into the corner with the tangly mangly grapevine resisting at every turn was great fun, but once in place it kept the vines up high and mostly manageable for the rest of the project.
I next built and positioned the other end assembly, which the allowed me to get the beams sitting pretty on their little ledges on the posts. I clamped the beams in position while I drilled the holes for the carriage bolts.
I debated whether I even needed the other two posts, as it seemed fairly sturdy, but I went ahead anyway. Thinking back to winter, I didn’t want any more trouble… So all six posts are in place now.

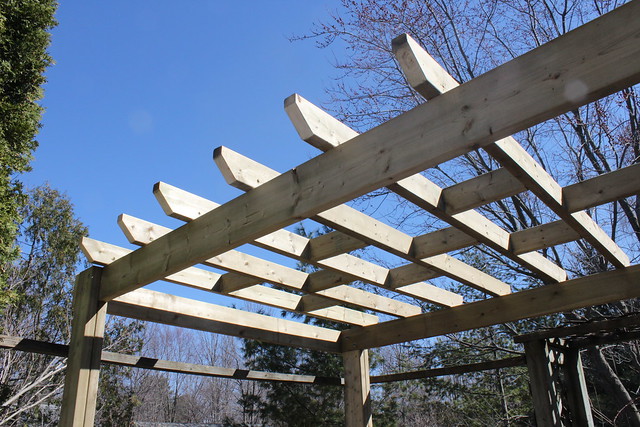
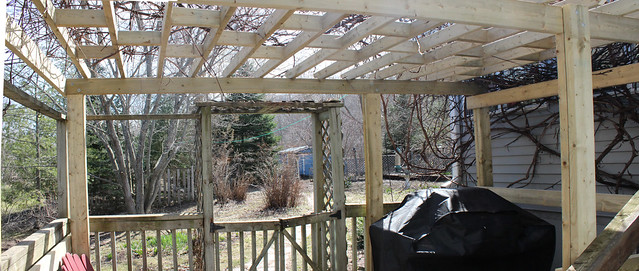
With the structure complete, it’s time to add the rafters. I built these as assemblies of two rafters at a time, with a pair of spacer blocks holding them together at the right spacing, 12 inches on centre. A third spacer in the center pointed the way for the next pair of rafters. This pattern of spacers repeats along the whole length of the pergola.
After some final wrangling (and swearing) as I used a 2×4 to push as much of the vine as possible back up onto the pergola, we called it done!
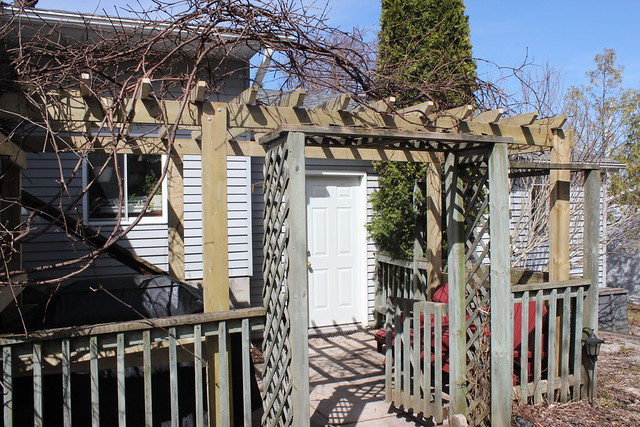
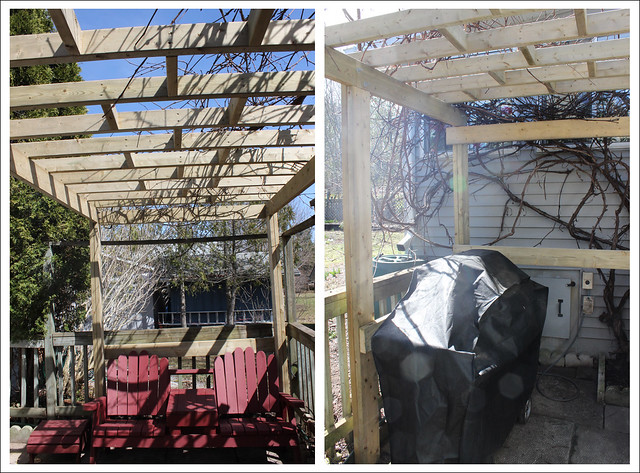
Time for a barbecue!
That’s a big-ass pile of pressure-treated lumber, all stickered for airflow. Needs to be a bit drier before I can work with it. That’s my story and I’m sticking to it.
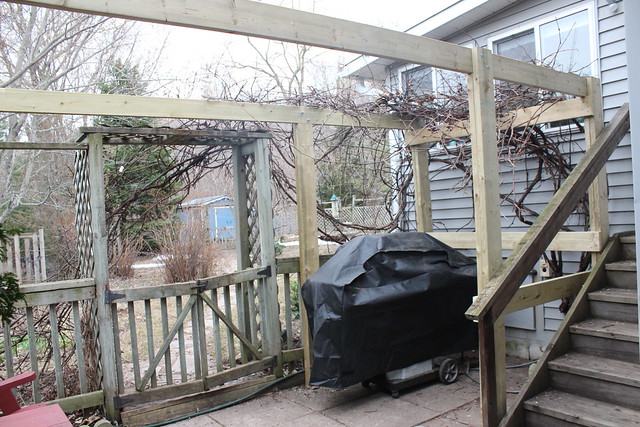
The old pergola (or is it an arbour?) was half-dismantled, leaving the sides only, to hold up the grapevine. The new bits should be able to slide in behind the old bits. This project would be a lot easier if it was just out in a field somewhere. All these obstructions (grapevine, fence, stairs, house) make it an interesting challenge…
(Click photos to view larger on Flickr.)
(continued from previous post)
Getting my Sketchup feet under me again, finally. Here’s the latest iteration of our Pergola. Plan-wise, I’ve changed the rafters to 2x4s instead of 2x6s and spaced them 12 inches on centre instead of 16. Which is exactly the kind of change that using Sketchup allows you to visualize up front, BEFORE you buy the wood! Even the shadows are accurate for an early afternoon in late April at our latitude and longitude. That can be quite helpful in some cases, I expect, but we already know which way the sun comes in on our patio, so it’s more for fun really.
(Click photo to view larger on Flickr)
Update: Here’s a Sketchup video walkthrough, or flythrough:
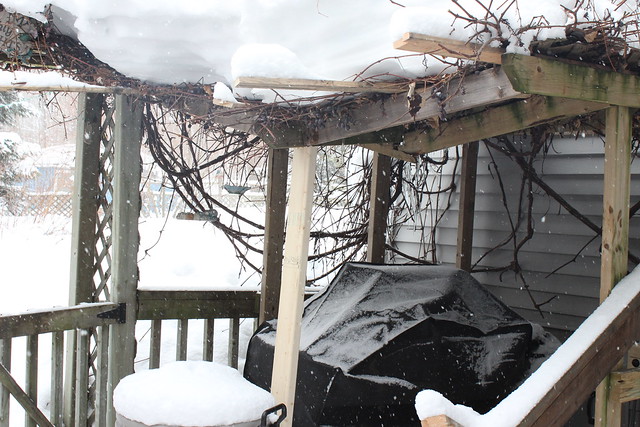
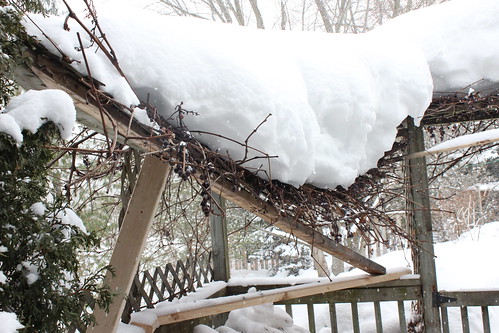
So far, the most serious casualty of this winter-that-never-ends, besides me achin’ back, is our grapevine arbour which covers, or covered, much of our little patio. There’s a fairly solid (I thought) portion over the barbecue, which I built a few years ago, and a hanging-by-a-thread section at the other end, which came with the house. We added a couple of 1×3’s across the gap this summer, to give the grapevine some extra places to go, to provide more shade.

(Click photo to view larger on Flickr)
After an all-too-brief period of slightly above freezing temperatures a few days ago, the snow got rained on and then re-froze. The extra weight proved too much for our little arbour to bear. I’ve got a couple of 2×4’s wedged under it to keep it from collapsing altogether.
The main section (which I built) seen in the photo above, gave way at in the middle of a small span that normally would have been adequate. Except in my cleverness, I decided it needed lap joints in the middle and an extra beam running lengthwise. This was the fail point, and in retrospect was something of a design flaw.
(Click photo to view larger on Flickr)
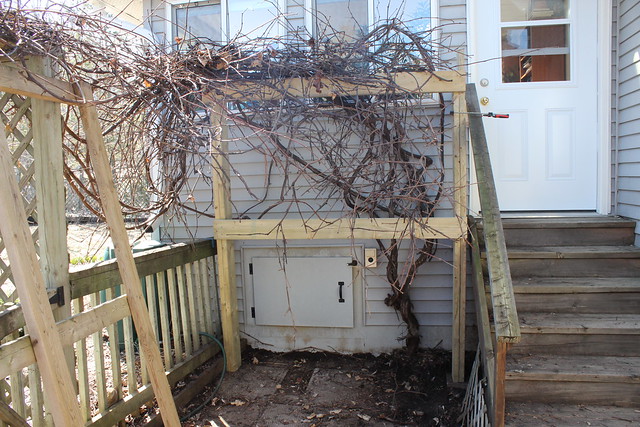
At the other end (seen in the second photo, above) we have the “legacy” portion of the coverage. It consisted of a diagonally-placed 2×4, just toe-nailed (later reinforced with a screw or two) into the posts, and a piece of lattice thrown up there. I’m actually surprised it lasted as long as it did. But we just couldn’t keep up with the snow squalls this year.
So, looks a spring project for me! I’m thinking, first of all, no lap joints in the middle of the span. Duh. Maybe go to 2×6. I was thinking about doing something with joist hangers, but I think that would be ugly, so I’m still mulling it over. Having to build it UNDER the existing grapevine was one of the main challenges last time, so I’ll see if I can figure out a way to make that easier. And I think we want full coverage over the whole patio this time. And because of that, it should be a bit higher for more headroom. Even so, the grapes hang down through the cracks, so you have to be careful!
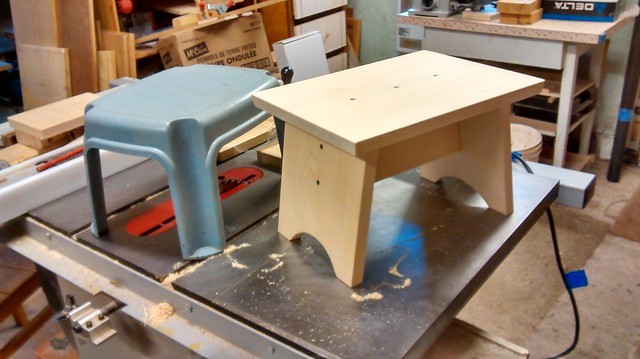
These are some outdoor plant stands, just made out of contruction lumber and pine shelf boards from Home Depot. They still need to be painted – my wife will take over from here. She doesn’t hate painting.
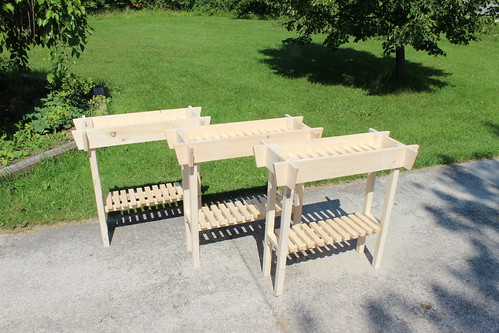

A single coat of Benjamin Moore’s highest quality outdoor paint, should stand up to weather and watering for a couple of years at least…